welcome page 만들기 - 도메인만 누르고 들어왔을 때 첫 화면
src - main - resources - static - index.html
<!DOCTYPE HTML>
<html>
<head>
 <title>Hello</title>
 <meta http-equiv="Content-Type" content="text/html; charset=UTF-8" />
</head>
<body>
Hello
<a href="/hello">hello</a>
</body>
</html>
spring.io - projects - spring boot - learn - 2.3.1 refer docu - welcome page
static 에서 index.html 을 찾고 못 찾으면 index.template을 찾음
메뉴얼에서 검색할 줄 알아야 함
정적 페이지 - 적어놓은 파일을 웹서버가 그대로 웹브라우저에 넘겨주는 것
템플릿 엔진 - 원하는 대로 루프를 넣는 등 모양을 변경할 수 있음
time leap 템플릿 엔진 - thymeleaf.org 사이트
웹 애플리케이션에서 첫번째 진입점이 컨트롤러
hello.hello.spring - package - controller package - helloController
@Controller 어노테이션 필요함
@Controller
public class HelloController {
 @GetMapping("hello")
 public String hello(Model model) {
 model.addAttribute("data", "hello!!");
 return "hello";
 }
}
웹 애플리케이션에서 /hello 로 들어오면 해당 메서드를 호출함
mvc model view controller 에 add attribute로 데이터를 hello로 넘길 것
templates - hello.html
<!DOCTYPE HTML>
<html xmlns:th="http://www.thymeleaf.org">
<head>
 <title>Hello</title>
 <meta http-equiv="Content-Type" content="text/html; charset=UTF-8" />
</head>
<body>
<p th:text="'안녕하세요. ' + ${data}" >안녕하세요. 손님</p>
</body>
</html>
th : 타임리프 템플릿 엔진이 선언되어 있어서 템플릿 엔진으로서 타임리프 문법 사용하는 방법
${data} model add attribute로 넣었던 데이터 hello 값 치환
실행 결과
주소 끝에 / hello 입력하면
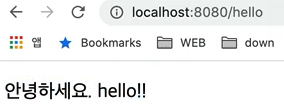
페이지 소스에는
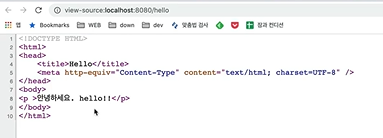
text="'안녕하세요. ' + ${data}" 문장에 컨트롤러의 hello!! 가 들어감

return hello 는 resources의 templates- hello.html 로 연결된다 by viewResolver
hello.html 의 add attribute의 value를 다른 값으로 바꾸면 바꾼 값으로 웹 페이지에 출력된다
spring-boot-devtools 라이브러리를 추가하면
html 파일을 컴파일만 해주면 서버 재시작 없이 View 파일 변경이 가능하다

'[ Development ] > [ Back-end ] Spring 기본' 카테고리의 다른 글
| [Spring 스프링] 3. 회원 관리 예제 3 - 회원 리포지토리 테스트 케이스 작성 (1) | 2023.10.03 |
|---|---|
| [Spring 스프링] 3. 회원 관리 예제 2 - 회원 도메인과 리포지토리 만들기 (0) | 2023.10.03 |
| [Spring 스프링] 3. 회원 관리 예제 1 - 비즈니스 요구사항 정리 (0) | 2023.10.03 |
| [Spring 스프링] 2-3. API (1) | 2023.10.03 |
| [Spring 스프링] 2-2. MVC와 템플릿 엔진 (1) | 2023.10.03 |
| [Spring 스프링] 2-1. 정적 컨텐츠 (1) | 2023.10.03 |
| [Spring 스프링] 1. 프로젝트 환경 설정 (0) | 2023.09.26 |


